Well, I am finally back! My last post was in August, it is now December. Wow, that's a long break. The Fall semester started and I haven't been able to work on this project until now. I always underestimate how much time working for a living takes. If only I could win the lottery or the publishing sweepstakes, oh well back to this project. I can't even remember where I left off, oh yeah, I had just finished bending the sides. That was a major hurdle and the next step is putting all the body pieces together. This is where it really starts to take shape and you can see some tangible progress. Before I begin to assemble the parts there is still some finish work to do on the top and back bracing. Also, I need to make the kerfed linings. Like all the other parts you can buy these already prepared from several luthier suppliers. They are usually made from mahogany or basswood. The wood is cut in long strips approximately 1/4"x5/8" and shaped into either a traditional triangular shape or a newer radiused style. After researching both styles, I decided to go with the newer radius reverse style to add a little more stiffness to the sides. I figured my sides needed all the help they could get. Again, trying to save a little money and go with available woods that I had in the shop, I chose a scrap of some furniture grade pine that Matt had in the shop. I cut my basic strips and set up the router table with a 3/8" round over bit to make my radius top. I then set up a basic pin stop on the radial arm saw to make repeatable 1/4" kerf cuts in the strips.
 |
| Radial arm saw set up for repeated kerf cuts. |
|
|
 |
| Radial arm detail. There is a hidden pin that fits into each cut slot allowing you to move the strip exactly the same amount to make each future cut the same distance apart. |
 |
| Reverse style kerfed lining. |
 |
| Back side showing radius. |
 |
| Kerfed side of the flexible lining. |
 |
| The kerfing, ready to attach to the bent side. |
The finished kerfing is attached to the bent sides to give a larger glue surface to make a stronger joint between the sides and the top and the back of the guitar.
The first step in assembling the body is to attach the two bent sides together making a frame or shell to then attach the top and then finally the back. The sides are held together by a block at both the top and bottom of the guitar. These blocks are usually cut and shaped from the same wood that the neck is made from. My neck is maple so my end blocks are also maple.
 |
| The two bent sides and the end blocks in position. |
As you can see the sides are long and over lap at this point. They must be trimmed square and to the appropriate length before assembling.
 |
| Detail showing end (top neck) block and over lapping sides. |
 |
| Detail showing bottom end block. |
 |
| Side view of sides before trimming and assembling. |
Each side was carefully measured and marked for length using the plans as a guide. The sides were cut using a dovetail saw and a square clamped in place to make sure the cuts are at 90 degrees. A liberal amount of wood glue was applied to the end blocks and the sides were centered and glued to each end block
 |
| Assembled side showing the top. |
 |
| Assembled sides showing the back. |
The end blocks were glued flush with the top but as you can see from the photos they are short on the back side. The excess on the sides will be removed before the back is attached. As I have stated previously a flat top guitar is not flat and neither is the back. In fact the back has a significant arch from top to bottom as well as a subtle arc side to side.
The top arc is primarily created by the under bracing but it must fit perfectly to the sides, so the assembled sides must be hand sanded to fit perfectly with the top. A large sanding board is constructed and used to slowly make these adjustments.
 |
| Sanding board made from large sanding belts attached to 3/4" MDF |
The side assembly is put back into the solera. A tight mold is created by sliding in the L braces and securing them with their threaded rods and wing nuts. This keeps the side assembly from moving while sanding. After the top is sanded to fit the kerf lining is attached to the sides. Wood glue is again used sparingly to avoid squeeze out and the lining is attached using spring clamps and modified close pins. The kerfed lining will be visible from the sound hole in the top so I had to take care in cleaning up the glue.
 |
| Kerf material ready to install. |
 |
| Spreader clamps to put outward pressure on the sides. |
 |
| Spring clamps removed showing only the vertical spreader bar. |
 |
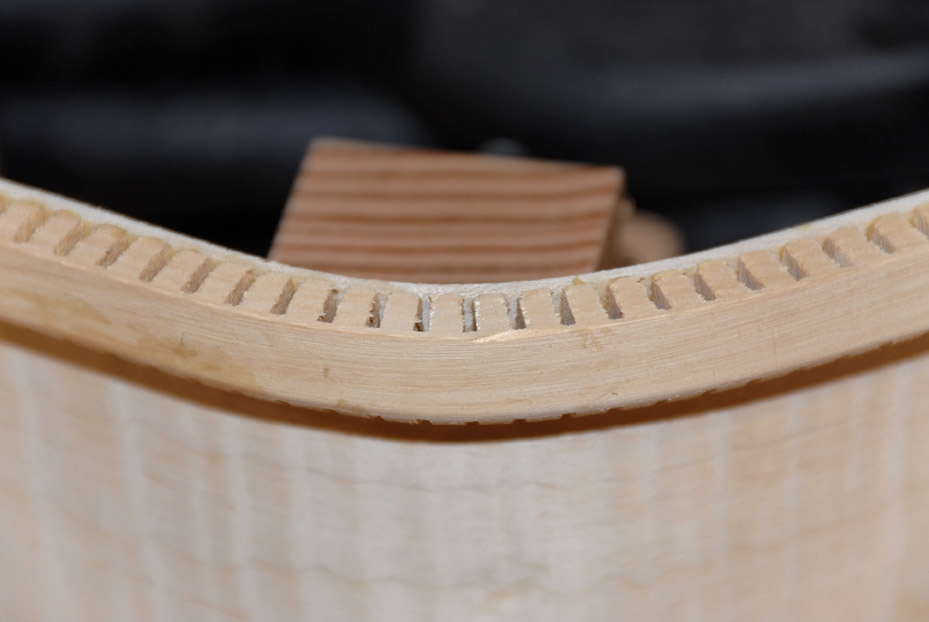
| Detail of installed kerf lining. |
 |
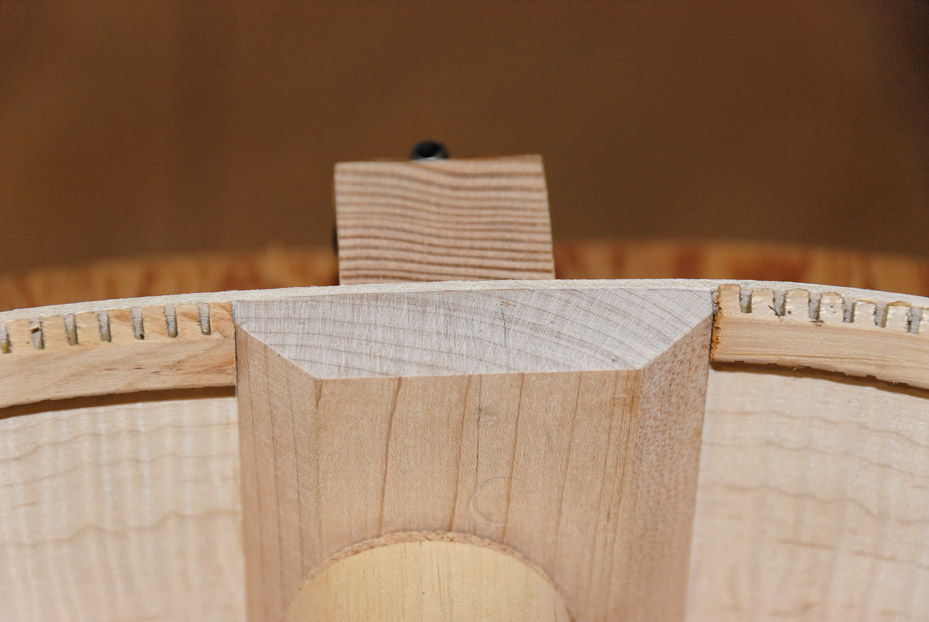
| Detail of kerfing and end block. |
 |
| Finished top kerfing. |
The next step involves cleaning up the bracing on the top so it will fit on top of the sides and inside the kerfing. The bracing was left long and now has to be removed using a chisel and a dovetail saw.
 |
| Using a dovetail saw to shorten the brace. |
 |
| Using a chisel to fine tune the fit. |
After fine tuning the fit on the bracing more sanding must be done on the sides and kerf lining so there is a perfect joint where the top fits on to the sides.
The top is now placed face down in the solera and the assembled sides are placed on top to make sure the fit is perfect. A small amount of glue is applied to the kerfed lining on the sides and put back into position on the top. The spool clamps are put into position evenly around the top and tightened down with wing nuts. An additional wood block is clamped on top vertically with bar clamps to insure equal downward pressure. The whole assembly is left overnight for the glue to dry.
 |
| Detail of inside showing neck adjustment hole in brace. |
 |
| Final clamping assembly. |


No comments:
Post a Comment